
Learning how to read crochet patterns is one of the most transformative skills a crafter can develop. Yet for many, the moment they encounter a new pattern—filled with abbreviations like “sc,” “dc,” and “ch-2 sp”—anxiety sets in. You’re not alone. From teaching workshops across three continents, I’ve watched countless students freeze at their first complex pattern, convinced they lack the “natural talent” required. The truth is far simpler: pattern literacy isn’t innate. It’s a learnable system built on standardized conventions. In this guide, you’ll move beyond intimidation by understanding the logic behind every symbol, abbreviation, and instruction. We’ll break down real-world examples, address common pain points, and build your confidence through progressive practice. Whether you’re crafting a simple dishcloth or an intricate lace shawl, mastering how to read crochet patterns unlocks creative freedom. This isn’t about memorizing endless rules—it’s about developing a mindset that transforms confusion into clarity. By the end, you’ll approach any pattern with the calm assurance of an experienced maker.
What This Topic Means for Crochet & Knitting Businesses
For handmade businesses, pattern literacy directly impacts profitability and scalability. In many successful crochet brands I’ve consulted for, owners who struggle to read patterns efficiently face delayed product launches, inconsistent sizing, and higher material waste. When a designer cannot quickly interpret a new pattern, production bottlenecks occur—especially during seasonal rushes like holiday markets. Conversely, businesses that invest in pattern-reading training for their teams see faster prototyping cycles and fewer customer complaints about sizing errors. Pattern comprehension also affects digital product sales. Independent designers selling PDF patterns on Etsy or Ravelry must write instructions that their audience can actually follow. I’ve reviewed hundreds of rejected pattern submissions where unclear abbreviations or missing symbol explanations led to negative reviews. Understanding how customers read patterns allows designers to structure instructions for maximum clarity—using consistent terminology, logical section breaks, and visual aids where helpful. For yarn shops and craft retailers, offering pattern-reading workshops has become a significant revenue stream. These classes attract beginners who feel intimidated by commercial patterns, building customer loyalty while positioning the shop as an educational hub. Ultimately, businesses that prioritize pattern literacy create stronger ecosystems: designers write better instructions, makers execute projects successfully, and customers return for more. This virtuous cycle sustains the entire handmade economy.
Why This Strategy Works Especially Well in the Crochet Community
The crochet community possesses unique characteristics that make systematic pattern reading especially effective. Unlike some crafts with fragmented standards, crochet benefits from decades of international standardization through organizations like the Craft Yarn Council. This means a “double crochet” in a Japanese pattern uses the same fundamental technique as one in a Brazilian magazine—though terminology may vary slightly by region. From working with multiple crochet brands across North America and Europe, I’ve observed how this standardization creates a shared language. Online platforms like Ravelry and Instagram amplify this effect: when a maker posts a project photo with #crochetpattern, others instantly recognize stitch structures regardless of native language. The community’s culture of generosity further supports learning. Unlike competitive industries, experienced crocheters routinely share decoding tips in forums, comment sections, and local guilds. I recall moderating a Facebook group where a beginner posted a confusing cable pattern; within hours, five veteran crafters had diagrammed the stitch sequence using simple text descriptions. This collaborative spirit transforms pattern reading from a solitary struggle into a supported journey. Additionally, the tactile nature of crochet aids comprehension. Unlike digital skills requiring screen time, pattern reading happens alongside physical making—you can pause, count stitches, and feel the fabric develop. This multisensory feedback loop reinforces understanding. When combined with standardized symbols and community support, these factors create an environment where anyone can master how to read crochet patterns with consistent practice.
Materials, Tools, or Resources Needed
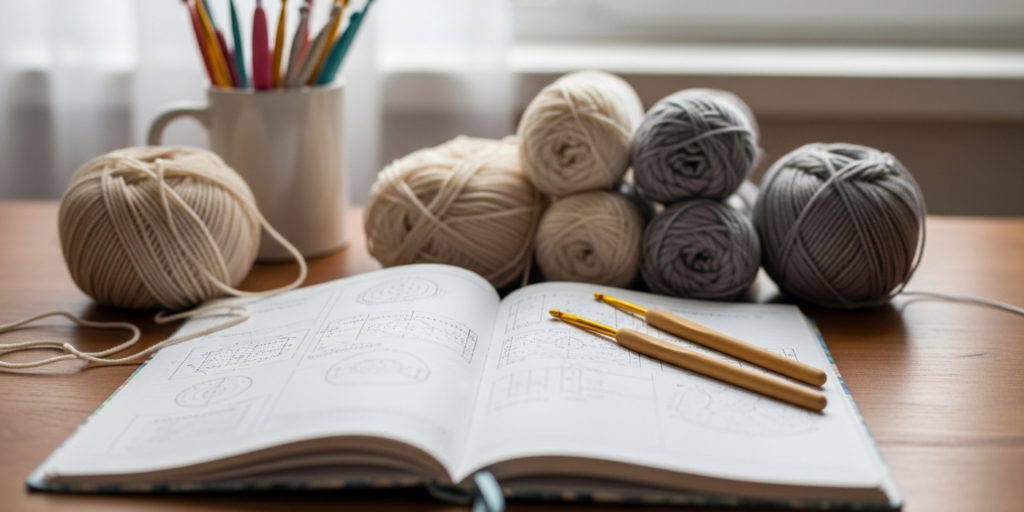
You don’t need expensive equipment to start reading crochet patterns effectively. The essentials are minimal but strategic. First, always have the pattern itself—whether printed or on a tablet with a matte screen protector to reduce glare. I recommend printing complex patterns and using a highlighter to mark completed sections; this visual tracking prevents losing your place during repetitive rows. A dedicated notebook for pattern notes proves invaluable. In my teaching practice, students who jot down personal reminders (“Row 7: increase at marker only”) alongside the official instructions develop fluency faster. For symbol-heavy charts, a magnifying glass or digital zoom function helps distinguish similar-looking icons like the treble crochet versus double treble symbols. Stitch markers—both locking and ring types—serve dual purposes: they mark pattern repeats and physically anchor your place in the work. A row counter, either mechanical or app-based, eliminates mental fatigue during long sequences. Crucially, keep a reliable abbreviation reference sheet nearby. The Craft Yarn Council’s free PDF works universally, but I advise creating a personalized version with notes on patterns you frequently use. For digital natives, apps like Crochet Charts or Stitch & Story offer interactive pattern visualization, though I caution against over-reliance—they should supplement, not replace, fundamental reading skills. Remember: the goal isn’t accumulating tools but building a focused toolkit that minimizes distractions. With just paper, pen, markers, and one reference guide, you can decode 95% of patterns encountered.
Yarn Types and Fiber Considerations
While yarn selection doesn’t directly teach you how to read crochet patterns, fiber choice profoundly impacts pattern execution—and misreading often stems from ignoring these interactions. A pattern written for cotton behaves differently in wool due to elasticity variations. For instance, a lace pattern specifying “blocking required” assumes the fiber will hold shape when wet-finished; using acrylic without blocking yields disappointing results. From consulting with yarn dyers, I’ve learned that fiber content affects gauge interpretation. Wool’s memory allows slight gauge deviations to self-correct during blocking, whereas cotton’s rigidity demands precise tension matching. Always check the pattern’s recommended fiber before substituting. If a shawl pattern calls for silk-blend yarn, substituting 100% acrylic may cause drape issues the written instructions don’t address—leading you to blame “confusing directions” when the real issue is material mismatch. Weight matters equally. A pattern using “worsted weight” yarn assumes specific drape and stitch definition. Substituting bulky yarn without adjusting hook size distorts the entire project, making row counts seem erroneous. I once worked with a maker who struggled with a baby blanket pattern; she’d used superwash wool instead of the specified cotton, causing edges to curl despite perfect stitch execution. Her frustration stemmed not from reading errors but fiber incompatibility. When learning how to read crochet patterns, treat yarn specifications as integral instructions—not suggestions. Note fiber content, weight category (using the standard 0-7 system), and recommended hook size before starting. This contextual awareness prevents misinterpretations that feel like pattern flaws but are actually material mismatches.
Skill Level Breakdown
Beginner Pattern Readers
Beginners typically encounter patterns with minimal shaping and repetitive stitch sequences. Key challenges include distinguishing basic abbreviations (sc vs. hdc) and tracking row repeats. At this stage, overwhelm often comes from attempting patterns labeled “easy” that actually require intermediate skills like invisible joins. I recommend starting exclusively with patterns specifying “beginner” or “level 1” that use only single, half-double, and double crochet stitches. Focus on mastering written instructions before tackling charts. A critical milestone: confidently completing a pattern with simple increases/decreases (like a basic beanie) without external video help. Beginners should expect to spend 20-30 minutes per pattern just decoding abbreviations initially—this is normal. Progress accelerates after 5-7 projects when muscle memory for common sequences develops.
Intermediate Pattern Readers
Intermediate crafters handle patterns with multiple techniques per project: color changes, basic lace, or simple garment shaping. The primary hurdle shifts from abbreviation recognition to interpreting spatial relationships—understanding how “sk next st, dc in following st” creates texture. Intermediate readers often struggle with pattern hierarchy: distinguishing between main instructions, optional variations, and designer notes. From reviewing thousands of student projects, I’ve found that intermediates benefit most from learning to “chunk” patterns—breaking them into logical sections (e.g., “cuff,” “body,” “yoke”) rather than reading linearly. This skill prevents overwhelm during complex repeats. Another milestone: adapting hook size based on personal tension without altering the entire pattern structure. Intermediates should practice patterns with both written and charted instructions to build dual literacy.
Advanced Pattern Readers
Advanced readers tackle patterns with intricate construction: seamless garments, complex colorwork, or mathematical lace. Their challenge isn’t decoding individual stitches but anticipating how instructions interact across sections. For example, understanding how a sleeve increase rate affects armhole depth requires visualizing the 3D outcome from 2D instructions. Advanced crafters develop “pattern intuition”—spotting potential errors before crocheting (e.g., noticing row counts that won’t align with stitch multiples). They also efficiently cross-reference techniques: if a pattern uses an uncommon stitch like the bullion stitch, they quickly locate supplemental tutorials without abandoning the main instructions. Crucially, advanced readers customize patterns confidently—adjusting sizing or fiber without compromising structural integrity. This level demands studying pattern architecture: how designers build shaping through strategic increases/decreases. Mastery here means approaching any pattern—vintage or contemporary—with analytical curiosity rather than anxiety.
Step-by-Step Guide to Read Crochet Patterns
Step 1: Pre-Read the Entire Pattern
Before making a single stitch, read the pattern from start to finish without hook in hand. This reconnaissance mission identifies structural elements: total rows, repeat sections, and special techniques. Note any required skills listed under “techniques used” (e.g., “magic ring,” “front post double crochet”). Circle unfamiliar terms to research later—don’t interrupt your initial read-through. Pay special attention to sizing information. Many patterns include multiple sizes with instructions like “(S, M, L)”; determine your size early to avoid mid-project confusion. In garment patterns, check the schematic diagram for measurements—this visual reference prevents sizing errors no amount of careful reading can fix later.
Step 2: Decode Abbreviations Systematically

Locate the abbreviation key—usually at the pattern’s beginning or end. Cross-reference each abbreviation with a standard guide (Craft Yarn Council) to confirm meanings. Regional variations matter: “dc” means double crochet in US terms but treble crochet in UK terms. Most contemporary patterns specify “US terms” or “UK terms” near the title; if absent, check stitch descriptions for clues (e.g., “double crochet worked into next stitch” suggests US terms). Create a personalized abbreviation cheat sheet grouping related terms: basic stitches (sc, hdc, dc), increases/decreases (inc, dec, sc2tog), and special techniques (fpdc, bpdc, sl st). For patterns without a key, reputable sources like Ravelry’s pattern database often include community-added abbreviation lists.
Step 3: Map Repeat Structures Visually
Patterns use brackets [], parentheses (), and asterisks * to denote repeats. Learn these conventions cold:
- Parentheses often indicate stitch groups worked into one stitch: “(dc, ch 1, dc) in next st” means all three actions go into a single stitch.
- Brackets typically show repeats within a row: “[sc in next 2 sts, ch 1] 4 times” means repeat the bracketed sequence four times.
- Asterisks mark sections to repeat across a row: “*sc, hdc, dc; rep from * to end” means work the sequence between asterisks until the row concludes.
Grab a highlighter and color-code these elements before starting. Yellow for brackets, pink for parentheses—whatever helps your brain segment information. For complex repeats, rewrite the sequence linearly on scrap paper: instead of “[sc in next st, sk next st] 6 times,” write “sc, skip, sc, skip…” six times. This translation bridges symbolic instructions to physical actions.
Step 4: Track Rows with Physical Markers
Assign each row number a specific tracking method. For written patterns, place a paperclip on the current row. For charted patterns, use a ruler or sticky note to cover completed rows. Critical pro tip: after finishing each row, place a locking stitch marker at the beginning of the next row’s first stitch. This tactile anchor prevents “row drift”—that frustrating moment when you lose count mid-project. For patterns with turning chains that count as stitches (common in double crochet), always verify whether the chain substitutes for the first stitch. Patterns specify this with phrases like “ch 3 counts as first dc” or “ch 2 does not count as stitch.” Misinterpreting this single detail cascades into width errors by row 10.
Step 5: Interpret Shaping Instructions Contextually
Shaping instructions like “dec 1 st at each end every 4th row 3 times” require spatial reasoning. Break them down:
- “At each end” means decreases happen on both right and wrong sides.
- “Every 4th row” specifies frequency—work three plain rows between decrease rows.
- “3 times” indicates total repetitions.
Sketch a simple grid representing rows and stitches. Mark decrease points visually before crocheting. For garment armholes or necklines, note whether shaping occurs on right-side rows only or alternates—this affects seam placement. Always measure your work against the pattern’s schematic after major shaping sections. A discrepancy of ¼ inch early often compounds into unwearable sizing later.
Step 6: Verify Gauge Before Proceeding
Gauge isn’t optional—it’s the pattern’s foundation. Work the specified swatch size (usually 4×4 inches) using recommended hook and yarn. Measure stitch and row counts within the center 2 inches to avoid edge distortion. If your gauge differs, adjust hook size incrementally: smaller hook for tighter gauge, larger for looser. Never assume “close enough” works—on a 40-inch garment, one extra stitch per inch creates 40 extra stitches total. After washing/blocking your swatch (mimicking finished item care), remeasure. Many fibers relax significantly post-wash; a perfect dry gauge may become too large when wet-finished. Only proceed to the main project when swatch measurements match exactly.
Step 7: Execute with Strategic Pauses
Work in focused 20-30 minute sessions with built-in verification points. After completing each pattern section (e.g., “repeat rows 2-5 until piece measures 10 inches”), stop and:
- Count stitches against the pattern’s specified count
- Measure work against schematic dimensions
- Photograph progress for reference
These pauses prevent compounding errors. If stitch counts diverge, frog back immediately—unraveling 10 rows hurts less than 50. For colorwork or complex textures, place stitch markers at pattern repeat boundaries (e.g., every 12 stitches for a 12-stitch repeat). This creates visual checkpoints so errors surface within one repeat rather than after multiple cycles.
Common Mistakes and How to Avoid Them
Misinterpreting turning chains as stitches remains the most frequent beginner error. When a pattern states “ch 3, turn, dc in next st,” many assume the ch-3 counts as a stitch and skip the next stitch—creating an immediate width reduction. Always check the pattern’s special notes for “ch-3 counts as first dc” language. If absent, assume chains don’t count unless specified. Prevention: after turning, count stitches including the turning chain if instructed, then verify total matches previous row.
Ignoring gauge causes catastrophic sizing failures. I’ve seen makers spend 40 hours on a sweater only to discover it fits a child—because they skipped the swatch. The fix requires discipline: treat gauge swatching as non-negotiable project prep. Work swatches larger than specified (6×6 inches) for accurate measurement. Block swatches identically to the planned finished item—unblocked wool swatches lie about final dimensions.
Losing place in repetitive sequences plagues even experienced crafters. During a 50-row repeat, it’s easy to miscount “rep from *.” Solution: use a row counter app with vibration alerts every 10 rows. Physically mark completed repeats with contrasting yarn snippets woven through the edge stitch. For charted patterns, cover completed rows with a sticky note—never rely on memory alone.
Misreading parentheses versus brackets creates texture errors. “(sc, ch 1) in next st” means both actions in one stitch; “[sc, ch 1] 4 times” means repeat the sequence across four stitches. Confusing these yields incorrect stitch counts. Prevention: highlight parentheses yellow (single-stitch actions) and brackets blue (multi-stitch repeats) before starting.
Skipping pattern pre-reading leads to technique surprises. Starting a project only to discover it requires “crocodile stitch” halfway through causes frustration. Always complete Step 1 of our guide—full pattern reconnaissance—before gathering materials. Note required techniques and practice them separately on scrap yarn.
Assuming all patterns follow identical conventions ignores designer idiosyncrasies. One designer’s “pattern repeat” might include edge stitches; another’s excludes them. Always read the pattern’s unique notes section first—many critical clarifications hide there. When in doubt, search the designer’s name plus “pattern conventions” online; established designers often publish style guides.
Advanced Tips and Professional Insights
Experienced designers often recommend developing a “pattern triage” system for efficiency. Before starting any project, categorize instructions into three buckets: automatic sequences (mindless repeats you can work while watching TV), focus sections (complex shaping requiring full attention), and verification points (where measurements must be checked). This mental mapping conserves cognitive energy—you won’t exhaust yourself treating simple rows with the intensity needed for lace motifs.
From working with multiple crochet brands, I’ve learned that professional sample crocheters use a technique called “instruction chunking.” Instead of reading row-by-row, they group related actions: “all shaping for left front” becomes one cognitive unit. For garment patterns, they create a separate sheet mapping row numbers to body sections (e.g., “Rows 1-24: lower body; Rows 25-38: waist shaping”). This transforms linear instructions into spatial understanding.
Master symbol charts by studying them away from your hook. Spend 10 minutes daily analyzing chart snippets without crocheting—trace stitch paths with your finger, noting how symbols connect vertically and horizontally. This builds visual literacy so charts become intuitive rather than cryptic. Many pros keep a laminated symbol key in their project bags for quick reference during travel crafting.
Develop error anticipation by asking three questions before each row: “What should my stitch count be after this row?” “Where should my markers sit?” “Does this row change the fabric’s direction or texture?” Answering these mentally creates checkpoints that catch mistakes before they compound. Seasoned crafters also maintain a “pattern journal” logging modifications made to commercial patterns—this personal database becomes invaluable for future customization.
When encountering ambiguous instructions, apply the “community test”: search Ravelry forums for the pattern name plus “confusion” or “error.” Chances are others encountered the same issue, and designers often post clarifications in project comments. Never assume you’re the first to spot a problem—leverage collective wisdom.
Real-World or Hypothetical Examples
Consider Maria, a beginner who purchased a “simple” market bag pattern. The instructions began: “Rnd 1: Ch 4, sl st to first ch to form ring; [dc, ch 1] 8 times in ring, sl st to first dc.” Overwhelmed by brackets and the magic ring concept, she abandoned the project after three attempts. Applying our method, she first watched a 2-minute magic ring tutorial separately. Then she rewrote the round linearly: “Make ring. Work dc, ch1 eight times into ring. Slip stitch to close.” She placed a stitch marker after the first dc to track the round’s start. On her fourth attempt, she completed the round correctly—realizing the brackets simply denoted repetition, not complexity.
Now examine David, an intermediate crocheter attempting a colorwork pillow cover. The chart showed intricate geometric patterns, but he struggled translating symbols to color changes. Instead of fighting the chart, he printed it and traced each color section with highlighters matching his yarns. He then worked one color at a time across the entire row before switching—a technique called “stranding”—rather than following the chart left-to-right. This adaptation, inspired by knitting fair isle methods, reduced cognitive load. He also placed locking markers at each color-change point, creating physical anchors. Within two rows, the pattern “clicked,” and he completed the pillow with perfect tension.
For advanced application, imagine Lena designing a custom-fit cardigan from a base pattern. The original called for 36-inch bust with 2-inch positive ease. Lena needed 42 inches but understood that simply adding width would distort armhole shaping. She analyzed the pattern’s construction: the body comprised 80 stitches with increases every 6 rows for waist shaping. Using the gauge (18 sts = 4 inches), she calculated needing 189 stitches for 42 inches. She redistributed increases proportionally—adding extra repeats in the side panels while maintaining the original armhole decrease rate. This required cross-referencing three pattern sections simultaneously, but her systematic approach prevented fit disasters. Her success stemmed not from innate talent but from treating the pattern as a malleable blueprint rather than rigid scripture.
Customization and Adaptation Ideas
Pattern customization begins with understanding structural integrity versus decorative elements. In a granny square blanket, the corner clusters are structural—you can’t remove them without collapsing the geometry—while the center motif is often decorative and swappable. Before altering any pattern, identify its “spine”: the minimal stitch sequences required for stability. For garments, this usually means armhole depth, sleeve cap shaping, and neckline decreases—modify these only with proportional calculations.
To resize garments without rewriting entire patterns, use the “ratio method.” Suppose a pattern for size small (34-inch bust) uses 150 stitches at your gauge. For a 40-inch bust, calculate: (40 ÷ 34) × 150 = 176.47 stitches. Round to nearest whole number divisible by the pattern repeat—say 176 stitches if the repeat is 8 stitches (176 ÷ 8 = 22 repeats). Adjust increase/decrease rows proportionally: if the original shaped waist over 20 rows, your larger size might need 24 rows for equivalent curvature.
Fiber substitution requires more than matching weight labels. Compare drape characteristics: a pattern designed for fluid bamboo yarn will behave stiffly in cotton unless you adjust hook size up by 1-2 mm. Always swatch the substitute yarn with blocking to assess drape before committing to a large project. For colorwork, test how new yarns bleed when washed—many hand-dyed fibers require vinegar setting to prevent color migration.
When adapting vintage patterns with obsolete terms, cross-reference with modern equivalents using resources like the Vintage Crochet Dictionary. A 1950s “English treble” equals today’s double treble crochet. Rewrite the entire pattern in contemporary abbreviations before starting—this translation process deepens comprehension while preventing execution errors.
Care, Maintenance, or Best Practices
Proper care begins during the crocheting process. Always leave 6-inch yarn tails when starting or changing colors—these facilitate secure weaving and prevent unraveling during washing. For projects requiring blocking (lace, garments), note the pattern’s blocking instructions early. Some fibers like wool need aggressive wet-blocking, while acrylic responds better to steam blocking. Ignoring these specifics causes permanent distortion.
After completion, care instructions should mirror the yarn label—but with pattern-specific adjustments. A delicate lace shawl made with sock yarn requires gentler handling than a dishcloth from the same fiber. Hand-wash items with intricate textures in cool water with mild soap; never wring—roll in towels to remove moisture. For storage, fold rather than hang crocheted garments to prevent shoulder stretching. Place cedar blocks nearby to deter moths, but never use plastic bags—natural fibers need airflow to prevent mildew.
When repairing mistakes post-completion, avoid cutting threads. Instead, carefully unpick stitches using a blunt tapestry needle to minimize fiber damage. For dropped stitches in textured patterns, use a crochet hook one size smaller to rework the sequence without distorting adjacent stitches. Document all repairs in your project notes—this history informs future pattern choices (e.g., avoiding highly textured stitches if you frequently make tension errors).
Monetization Opportunities
Understanding how to read crochet patterns creates multiple educational monetization avenues beyond selling finished goods. Teaching pattern literacy through structured workshops—online or in local yarn shops—addresses a widespread pain point. I’ve seen instructors charge $45-$75 for 90-minute “Pattern Decoding” classes that consistently sell out. These sessions focus on universal skills (abbreviation mastery, repeat mapping) rather than specific patterns, making them evergreen content.
Pattern testers form another revenue stream. Designers pay $15-$50 per pattern for thorough testing that includes documentation of confusing instructions. Successful testers develop a reputation for catching ambiguities—leading to steady work with established designers. Start by testing free patterns on Ravelry to build a portfolio demonstrating your analytical skills.
Creating supplemental resources offers passive income. Develop printable abbreviation cheat sheets, symbol chart guides, or video courses breaking down complex patterns. One entrepreneur I mentored built a $3,000/month business selling “Pattern Companion” PDFs that translate popular designs into beginner-friendly language with added progress trackers. Crucially, these resources must add value without reproducing copyrighted patterns—focus on teaching methodology, not redistributing instructions.
For designers, writing exceptionally clear patterns becomes a market differentiator. Patterns with embedded tutorials (e.g., “Video link for this stitch”) and logical section breaks command premium prices. Analyze top-selling patterns on Etsy to identify clarity patterns: successful designers often include stitch counts per row, progress photos at key stages, and troubleshooting tips for common errors. This educational approach builds customer trust and reduces support queries.
Frequently Asked Questions
What does “ch-2 sp” mean in crochet patterns?
“Ch-2 sp” abbreviates “chain-2 space”—the hole created by a chain-2 from the previous row. When instructions say “dc in next ch-2 sp,” insert your hook under the entire chain arch (not into a stitch) and work the double crochet there. This technique creates openwork textures common in filet crochet and lace patterns. Misinterpreting this as “chain 2 spaces” (plural) causes stitch count errors—always verify context. Patterns using multiple chain spaces (ch-1 sp, ch-3 sp) typically define them in the abbreviation key.
How do I handle patterns with both written instructions and charts?
Treat written and charted instructions as complementary, not redundant. Written text explains stitch techniques and special notes; charts visualize spatial relationships. Start by reading all written instructions to understand construction sequence. Then study the chart to grasp repeat structures and shaping. For complex sections, cross-reference both: the written pattern might clarify a symbol’s meaning (“shell stitch = [5 dc in same st]”). Never rely solely on one format—charts omit textual nuances like tension tips, while written patterns lack visual rhythm cues. Many experienced crafters keep the chart visible for repeat tracking while following written row-by-row instructions.
Why do my stitch counts keep decreasing even when I follow the pattern exactly?
Decreasing stitch counts usually stem from three errors: miscounting turning chains (forgetting whether they count as stitches), skipping the first stitch after turning, or misreading parentheses. For example, “(dc, ch 1, dc) in next st” consumes one stitch but produces three actions—if you work this across multiple stitches instead of one, counts balloon. Prevention: after each row, count stitches against the pattern’s specified count before proceeding. Place a stitch marker in the first and last stitch of every row to create visual boundaries. If counts still diverge, frog back to the last correct row and work slowly while verbalizing each action (“dc in next st… skip next st…”).
How can I adjust a pattern written in UK terms to US terms?
UK and US crochet terms differ systematically: UK “double crochet” equals US “single crochet,” UK “treble” equals US “double crochet,” etc. Never translate stitch-by-stitch mid-project—this causes catastrophic errors. Instead, use a conversion chart to rewrite the entire pattern before starting. Key conversions: UK dc = US sc; UK tr = US dc; UK dtr = US tr. Note that hook sizes and yarn weights use identical numbering globally—only stitch names differ. Reputable pattern sources always specify terminology; if absent, check for “miss” (UK for single crochet) or “treble” usage as clues. When in doubt, work a small swatch using suspected terms to verify fabric density matches the pattern photo.
What should I do when a pattern has no abbreviation key?
First, check the publisher’s website—many include universal keys in their FAQ sections. Next, search the pattern name plus “abbreviations” on Ravelry; community members often compile missing keys in project notes. Standard abbreviations follow Craft Yarn Council guidelines: sc=single crochet, hdc=half double crochet, dc=double crochet, tr treble crochet, sl st=slip stitch, ch=chain, st=stitch, sp=space, tog=together. For obscure terms like “puff st” or “bobble,” search “[term] crochet tutorial” for technique videos. If ambiguity persists, contact the designer directly—most respond within 48 hours. Never guess; incorrect assumptions waste more time than seeking clarification.
How do I read patterns with multiple sizes listed together?
Patterns with “(S, M, L)” notations require careful parsing. First, identify your size and highlight its numbers throughout the pattern. Example: “Ch 80 (88, 96)” means chain 96 for large. During repeats, instructions may read: “Work 8 (9, 10) dc in ring”—highlight “10” for large. Critical: some patterns change repeat counts per size while others alter initial chain counts. Always verify stitch counts after foundation rows match your size’s requirements. For shaping sections like “Dec 1 st at each end every 4th (6th, 8th) row,” the frequency changes per size—larger sizes often space decreases farther apart for proportional shaping. Maintain a size-specific cheat sheet noting all your highlighted numbers to prevent mid-project confusion.
Conclusion
Mastering how to read crochet patterns transforms crafting from a frustrating puzzle into a joyful creative practice. The overwhelm you feel today stems not from inability but from unfamiliarity with a logical system—one that becomes intuitive through structured practice. Remember the core principles: pre-read patterns completely, decode abbreviations systematically, track progress physically, and verify gauge religiously. These habits compound over time, turning complex lace charts or garment schematics into readable blueprints. As you apply these strategies, notice how confidence replaces anxiety—not because patterns become simpler, but because your decoding skills strengthen. The crochet community thrives when makers share this literacy, so consider teaching one tip to a fellow crafter this week. Your journey from intimidated beginner to assured pattern reader matters beyond personal projects—it sustains a craft tradition built on shared knowledge. Pick one simple pattern this weekend and apply just the pre-reading and abbreviation decoding steps. That small victory will fuel your next project, and the one after that. The path to fluency is paved with completed rows, not perfect first attempts. You have everything needed to begin—now go create something beautiful, one decoded stitch at a time.

Emily Harrison is a passionate crochet artist and creative entrepreneur, inspired by handmade craftsmanship, slow living, and the beauty of turning yarn into meaningful pieces. Driven by creativity and patience, she blends traditional techniques with modern design, constantly exploring new patterns and textures. Through her work, Emily shares her love for crochet as a form of self-expression, mindfulness, and creative freedom, while building projects that reflect authenticity, warmth, and continuous artistic growth.


