
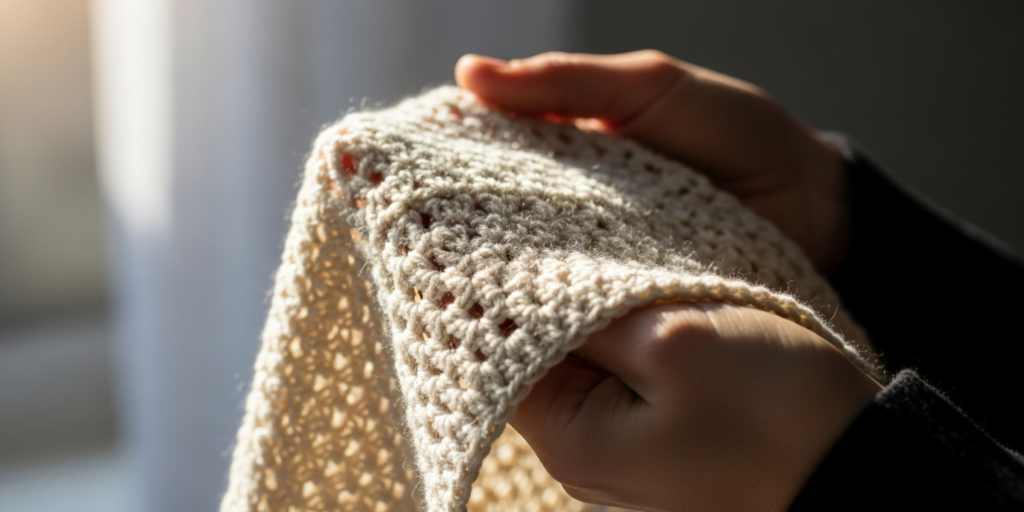
In the world of crochet, the difference between a handmade item that looks store-bought and one that appears homemade often lies in the finishing techniques. Professional finishes in crochet are not just about aesthetics; they enhance durability, comfort, and overall quality. For advanced crocheters, mastering these techniques is essential for creating pieces that stand the test of time and impress clients or customers. Whether you’re working on intricate lace shawls, fitted garments, or textured blankets, the final touches can make or break the project. From seamless joins to invisible weaving, every detail contributes to a professional appearance. In this comprehensive guide, we will explore step-by-step techniques, common pitfalls, and expert insights to help you achieve flawless finishes in your advanced crochet work. Drawing from years of experience in the handmade industry, I’ll share practical advice that you can apply immediately to elevate your projects. Understanding the importance of tension, yarn behavior, and tool selection is crucial. We’ll cover everything from blocking methods to edging techniques, ensuring your projects look as good as they feel while meeting the exacting standards expected in today’s competitive handmade market.
What Professional Finishes Mean for Crochet & Knitting Businesses
For crochet and knitting businesses, the quality of finishes is a critical factor in market success and long-term sustainability. In many handmade brands I’ve consulted with over the years, items with meticulous finishes consistently receive higher customer ratings, generate fewer returns, and justify premium pricing structures. Customers intuitively recognize the value in pieces that look professionally made, as it reflects not only technical skill but also respect for their investment. This perception directly impacts profitability; a well-finished garment can command 30-50% higher prices than an identical piece with sloppy ends or uneven seams. From working with multiple Etsy sellers and boutique owners, I’ve observed that professional finishes in crochet significantly reduce customer service issues related to unraveling edges or distorted shapes after washing. Moreover, in an era where social media showcases drive purchasing decisions, beautifully finished items photograph better, generating more shares, saves, and ultimately sales. The business implications extend beyond individual transactions—consistent finishing quality builds brand reputation, encourages repeat customers, and creates word-of-mouth referrals that are invaluable for growth. For artisans operating at scale, standardized finishing protocols become essential for maintaining quality control across production batches. Ultimately, viewing finishing not as an optional extra but as an integral component of the creation process transforms it from a cost center into a strategic differentiator that supports business resilience and expansion.
Why Professional Finishes Work Especially Well in the Crochet Community
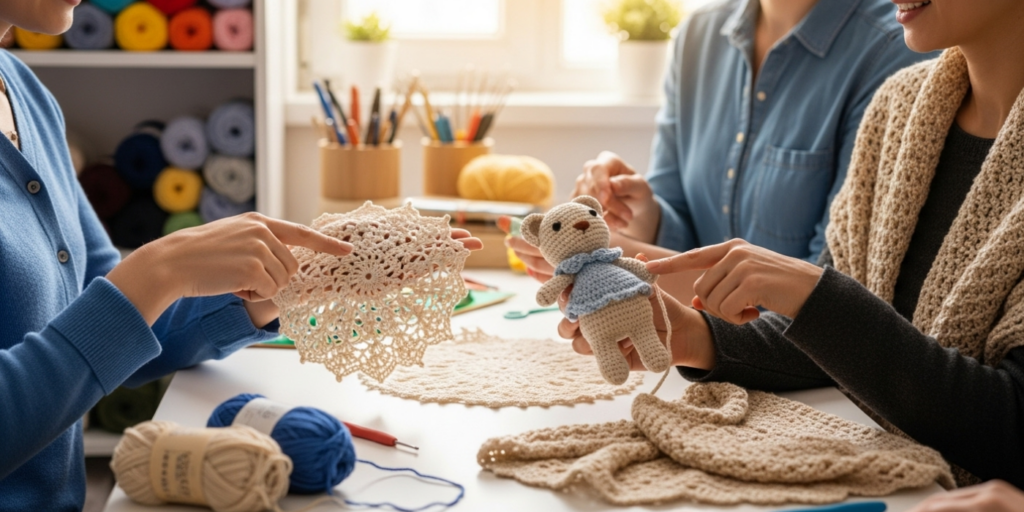
The crochet community possesses a unique cultural appreciation for technical mastery that makes professional finishes particularly impactful and valued. Unlike some crafts where construction methods remain hidden, crochet often celebrates visible stitch definition and texture, making finishing techniques an extension of the artistic expression rather than mere cleanup. This cultural context creates fertile ground for finishing excellence to be recognized and rewarded. From my years participating in fiber festivals, online forums, and local guilds, I’ve witnessed how pieces with expert finishes become educational touchpoints—other makers study the seams, examine the edgings, and ask detailed questions about techniques. This communal learning environment accelerates skill development across the entire community. Additionally, crochet’s versatility across project types—from delicate lace to sturdy home goods—means that finishing techniques must be adaptable, fostering innovation and knowledge sharing. The rise of crochet fashion on platforms like Instagram has further elevated expectations; followers now scrutinize not just stitch patterns but how garments hang, how seams align, and how edges frame the design. Experienced designers often recommend studying professionally finished vintage pieces in museum collections to understand timeless techniques that transcend trends. This community-wide emphasis on quality creates positive reinforcement loops where makers inspire each other to elevate standards, ultimately strengthening the craft’s reputation in the broader textile world. When advanced crocheters prioritize finishes, they contribute to shifting public perception of handmade items from “charmingly imperfect” to “competitively professional,” opening doors to collaborations with mainstream retailers and design houses.
Essential Materials and Tools for Professional Finishes in Crochet
Achieving professional finishes in crochet begins with assembling the right toolkit—investing in quality implements that support precision without breaking the bank. Start with rust-proof T-pins (at least 1.5 inches long) and a dedicated blocking mat system; these form the foundation for effective shaping. A high-quality tapestry needle with a large, blunt tip and elongated eye is non-negotiable for weaving ends invisibly—avoid needles that split yarn fibers. Sharp, precision-tip scissors (like embroidery scissors) ensure clean cuts without fraying delicate fibers. For blocking versatility, maintain both a handheld garment steamer and a spray bottle for different fiber needs. Additional specialized tools worth acquiring include blocking wires for lace projects to create crisp edges, stitch markers in multiple colors for alignment during seaming, and a flexible measuring tape with both inch and centimeter markings. A small lint roller proves invaluable for removing stray fibers before photography or gifting. For garment construction, a set of curved needles facilitates easier seaming through multiple fabric layers. When working with dark yarns, a lightbox or well-lit workspace prevents missed ends. From my experience teaching advanced workshops, I’ve found that makers who organize these tools in a dedicated finishing kit complete projects more efficiently and with greater consistency. Remember that tool quality directly impacts results—a bent pin can distort blocking, while dull scissors create fuzzy ends that undermine neatness. While beginners might start with basics, advancing crocheters should gradually build this toolkit, prioritizing items based on their most frequent project types. The initial investment pays dividends through time saved, reduced frustration, and noticeably elevated final results that reflect true craftsmanship.
Yarn Types and Fiber Considerations for Professional Finishes
The fiber content of your yarn fundamentally dictates which finishing techniques will yield professional results, making material selection as crucial as stitch execution. Natural animal fibers like wool, alpaca, and cashmere possess memory and elasticity that respond beautifully to wet blocking—water relaxes the fibers, allowing stitches to open and even out before drying into their new shape. However, superwash wools require caution as they can stretch excessively when wet; always support the garment’s weight during blocking. Plant fibers such as cotton, linen, and bamboo lack elasticity but hold blocked shapes exceptionally well once dried, though they often need more aggressive steaming to relax stitches fully. Mercerized cotton accepts blocking particularly well, developing a subtle sheen that enhances professional appearance. Synthetic fibers like acrylic present unique challenges—they don’t absorb water like naturals, making wet blocking less effective and potentially causing permanent stretching. Steam blocking works better for acrylics, but direct heat contact must be avoided to prevent melting; hover the steamer several inches above the fabric. Blends require thoughtful analysis; a wool-acrylic mix might need modified wet blocking with reduced soaking time. Always swatch and finish your swatch identically to the final project to anticipate behavior. Fiber considerations extend beyond blocking—silk blends may require dry cleaning only, affecting how you approach seaming and edging durability. For items requiring frequent washing like baby clothes, prioritize machine-washable fibers with finishes that withstand agitation. From collaborations with yarn companies, I’ve learned that understanding fiber characteristics prevents finishing disasters; a beautifully crocheted lace shawl can become misshapen if blocked using methods suited for wool when the yarn is actually 100% cotton. Professional finishes in crochet demand this fiber literacy—matching technique to material transforms potential pitfalls into opportunities for showcasing each fiber’s unique qualities through intentional finishing choices.
Skill Level Breakdown for Mastering Professional Finishes in Crochet
Mastering professional finishes in crochet follows a progressive skill development path where each level builds foundational habits essential for advanced work. Beginners should concentrate on three non-negotiable fundamentals: maintaining consistent tension throughout projects, weaving in ends with at least two inches of yarn secured in multiple directions, and learning to recognize when a project requires blocking versus when it doesn’t. Simple rectangular projects like dishcloths or scarves provide ideal practice grounds without the complexity of shaping. At the intermediate level, crocheters should master basic blocking techniques appropriate for their primary fiber types, learn simple seaming methods like the whip stitch for blankets, and develop the habit of finishing projects immediately after completion rather than accumulating a “finishing pile.” This stage is perfect for experimenting with different edging patterns on sampler blankets to understand how borders affect drape and shape. Advanced crocheters integrate finishing considerations from the project’s inception—selecting yarns with finishing behavior in mind, planning seam placements during construction, and executing complex techniques like invisible mattress stitch seams on set-in sleeves or perfecting picot edges on lace shawls. Crucially, advanced practitioners understand the “why” behind each technique, allowing adaptation to unconventional projects. From my years teaching workshops, I’ve observed that makers who rush through skill levels often develop persistent bad habits—like consistently weaving ends vertically when horizontal weaving would be more secure for their stitch pattern. Regardless of level, all crocheters benefit from maintaining a finishing journal documenting what techniques worked for specific yarns and projects. Professional finishes in crochet aren’t achieved through shortcuts but through deliberate practice at each stage, with patience being the universal prerequisite that separates adequate results from truly exceptional ones.
Step-by-Step Guide to Achieving Professional Finishes in Crochet Projects
Step 1: Project Assessment and Preparation
Before any finishing begins, conduct a thorough assessment under good lighting. Lay the project flat and examine it from multiple angles to identify inconsistencies in tension, misaligned pattern repeats, or areas where stitches appear looser or tighter. Check for any dropped stitches or errors that should be corrected now—fixing mistakes after blocking becomes exponentially more difficult. If the item will require washing during its lifetime (garments, baby items, kitchen textiles), pre-wash the project using the method you’ll recommend to the end user. This prevents unpleasant surprises like dramatic shrinking or color bleeding after gifting or selling. For items made with dark or hairy yarns, use a lint roller to remove surface fibers that could transfer during blocking. Prepare your workspace by clearing a flat surface larger than the project, gathering all necessary tools within reach, and ensuring adequate lighting. This preparatory phase, often overlooked by eager crafters, establishes the foundation for professional results by addressing issues while the fabric remains malleable.
Step 2: Fiber-Appropriate Blocking Execution
Blocking transforms crochet fabric by relaxing stitches into their intended shape and size. Begin by determining the appropriate method: wet blocking for woolens (submerge in lukewarm water with wool wash for 15-20 minutes, then gently squeeze—never wring—excess water), spray blocking for delicate items or plant fibers (lightly mist until damp but not saturated), or steam blocking for synthetics (hover steamer 2-3 inches above fabric without direct contact). Lay the damp project on your blocking mat, right side up. Using rust-proof pins, start by securing the four corners to approximate dimensions. For garments, pin critical points first: shoulder seams, underarms, sleeve caps, and hemlines, using a measuring tape to ensure symmetry between left and right sides. For lace, use blocking wires threaded through straight edges before pinning to create perfectly straight lines and sharp points. Work from the center outward, gently stretching the fabric to match pattern dimensions while maintaining the yarn’s natural drape—never force fibers beyond their elasticity. Pay special attention to edges; they should lie flat without ruffling or cupping. Allow to dry completely (24-48 hours depending on fiber and humidity) before removing pins. Rushing this step by removing pins prematurely causes rebound distortion.
Step 3: Precision Seaming and Joining Techniques
For multi-piece constructions like garments or amigurumi, seaming requires methodical attention. Begin by ensuring pieces are identically sized—a quarter-inch difference creates visible puckering. For vertical seams on stockinette-like crochet fabrics, the mattress stitch creates nearly invisible joins: using a tapestry needle and matching yarn, work from the right side, picking up one bar between stitches on each piece alternately. Maintain consistent tension—too tight creates ridges, too loose leaves gaps. For shoulder seams or areas requiring strength, the backstitch provides durability while remaining relatively discreet. When joining rounds for blankets or shawls, the slip stitch seam works beautifully when executed with the project inside out, catching only the back loops for a flat join. Always seam with the same fiber content yarn as the project to ensure consistent washing behavior. From professional production environments, I’ve learned that pinning pieces together with fine sewing pins before seaming prevents shifting and ensures perfect alignment. For set-in sleeves, seam the sleeve cap to the armhole with the garment right side out, easing fullness gradually rather than stretching to fit. After seaming, lightly steam the seam allowance flat (without direct contact) to meld stitches together.
Step 4: Invisible End Weaving Methodology
Weaving in ends constitutes the most frequently executed finishing task, yet poor execution undermines even beautifully blocked projects. Cut yarn tails to approximately six inches before beginning. Thread your tapestry needle and weave horizontally through the back loops of stitches for at least two inches—never vertically through rows, which creates visible lumps on the right side. For maximum security, change direction after two inches, weaving perpendicularly through adjacent stitches for another inch. In striped projects, weave ends along color change rows where they’ll be camouflaged. For slippery fibers like silk or superwash wool, weave in a triangular pattern (horizontal, then diagonal, then horizontal again) to prevent slippage. Always weave ends on the wrong side of the fabric, but for reversible projects, distribute weaving across both sides strategically. After weaving, gently stretch the fabric to ensure the end doesn’t create puckering, then trim excess yarn flush with the fabric surface—never leave visible tails. Crucially, weave ends as you work rather than accumulating them; this prevents confusion about yarn direction and ensures ends are secured before tension changes during blocking.
Step 5: Edging and Border Application
Borders frame your project and can correct minor inconsistencies in the main fabric. Always work edgings after blocking the main piece to ensure accurate sizing. Begin by calculating stitch counts carefully—use stitch markers every 20-30 stitches around the perimeter to maintain even distribution. For corners, employ standard increase techniques (like 3dc in corner stitch) consistently. When joining rounds, use an invisible join: before completing the final slip stitch, pull the loop through to the front, then insert hook into the first stitch of the round and pull through both loops. For lace edgings on shawls, work with a hook one size smaller than used for the body to create definition without overwhelming the main fabric. If adding multiple border rounds, block lightly between rounds for complex patterns to maintain shape. Professional finishes demand that edgings lie flat without ruffling; if ruffling occurs, frog back and adjust stitch count—typically by reducing corner increases or skipping occasional stitches along straight edges.
Step 6: Final Quality Control and Presentation
The concluding phase separates adequate finishes from professional ones. After all active finishing is complete, conduct a final inspection under natural light. Run your fingers over the entire surface to detect any missed ends, loose stitches, or irregularities. Check seams for gaps or puckering; secure any loose areas with a few discreet stitches. For garments, try on or dress a form to verify drape and hang—adjustments are still possible at this stage through strategic steaming. Remove any residual pin marks with gentle steam. For photography or gifting, give the item a final light steam (without direct contact) to refresh the fabric. Package thoughtfully: fold along natural lines, use acid-free tissue paper for storage, and include care instructions that reflect your finishing methods. This comprehensive approach ensures that every project leaves your hands representing your highest standards of craftsmanship.
Common Mistakes in Achieving Professional Finishes and How to Avoid Them
Even experienced crocheters fall prey to finishing errors that undermine their technical skill, but awareness and prevention strategies can eliminate these pitfalls. One pervasive mistake is skipping blocking entirely under the misconception that “it’s just a scarf” or “the pattern didn’t specify.” Unblocked projects often display uneven tension, distorted shapes, and closed-up lace patterns—blocking isn’t optional for professional results. Always block, adapting the method to your fiber. Another frequent error involves weaving ends too short or in a single direction, causing unraveling after minimal wear. Prevent this by weaving at least two inches in one direction, then changing direction for another inch, and trimming only after confirming security. Rushing seaming creates misaligned pieces with puckered or gapped joins; avoid this by pinning pieces together meticulously before stitching and working slowly with consistent tension. Using inappropriate blocking methods for fiber types causes disasters—wet blocking 100% acrylic can permanently stretch it, while insufficient blocking leaves cotton items stiff and misshapen. Always research fiber-specific requirements and test on swatches first. Ignoring the wrong side of the work leads to lumpy interiors that affect drape; professional finishes demand attention to both sides. From judging craft competitions, I’ve observed that inconsistent edging stitch counts cause ruffling—a problem solved by careful measurement and stitch marker use during border application. Perhaps most damaging is the “finishing pile” mentality—delaying finishing until accumulating multiple projects. This leads to rushed work and forgotten construction details. Instead, adopt the discipline of finishing each project immediately upon completion. Each mistake has a straightforward prevention strategy rooted in patience and methodical execution; integrating these safeguards transforms finishing from a dreaded chore into an integral, satisfying component of the creative process.
Advanced Tips and Professional Insights for Flawless Crochet Finishes
Elevating your finishes beyond competence to true artistry involves nuanced techniques that experienced makers develop through years of practice. One professional insight: when blocking lace shawls with intricate motifs, use stainless steel blocking wires threaded through picot edges before pinning—this creates razor-sharp points and perfectly straight lines unattainable with pins alone. For garment construction, adopt the “seam as you go” method for certain projects like raglan sweaters; joining pieces during crocheting eliminates later seaming while ensuring perfect alignment. When working with variegated or self-striping yarns, strategically place color changes at seam lines to camouflage joins—a technique I’ve seen master designers use to create seamless color transitions. For invisible end weaving on textured stitches like bobbles or popcorns, weave horizontally through the base rows beneath the texture rather than through the raised elements themselves. Another advanced approach: after weaving ends, lightly steam the area from the wrong side to felt natural fibers slightly, locking ends permanently without visible bulk. From collaborations with high-end handmade brands, I’ve learned that adding a subtle, coordinating border to the inside neck edge of garments prevents stretching and adds a luxury touch customers notice when trying on items. For projects requiring extreme durability like market bags, reinforce stress points by weaving a thin nylon thread alongside your yarn during seaming—completely invisible but dramatically increasing strength. Professional crocheters also maintain a “finishing swatch library”—small samples of different yarns finished with various techniques—to reference before committing to methods on valuable projects. Remember that the highest level of finishing artistry involves knowing when to break rules: sometimes a slightly visible, contrasting seam intentionally placed becomes a design feature rather than a flaw. These insights accumulate through mindful practice and observation, transforming technical execution into expressive craftsmanship.
Real-World Examples of Professional Finishes in Crochet
Concrete examples illuminate how professional finishes elevate projects from technically correct to exceptional. Consider a real-world case from a successful Etsy shop specializing in wedding accessories: their signature lace shawls use hand-dyed silk-wool blends that could easily become misshapen. By employing a meticulous wet-blocking process with custom-cut foam boards and stainless steel wires for the edging, each shawl achieves identical dimensions and perfect motif definition. Ends are woven along the shawl’s spine where lace patterns naturally conceal them, making finishing completely invisible. The result? Shawls that photograph beautifully for online sales and maintain their shape through multiple wearings—critical for heirloom items. Another example comes from a designer creating children’s amigurumi for boutique stores. Rather than using standard whip stitches for assembly, they employ an invisible ladder stitch for all seams, ensuring no gaps where stuffing might escape. Eyes and features are embroidered after assembly using split stitching for dimension, then secured with multiple knots on the interior. Most importantly, all ends are woven through multiple limbs before trimming, preventing unraveling during toddler handling. From my experience consulting with a small-batch clothing brand, their success hinged on finishing details: set-in sleeves were seamed using a modified mattress stitch that followed the garment’s natural curve, then lightly steamed to create a smooth cap without bulk. Hems received a folded edge worked during crocheting rather than added later, eliminating bulk at the garment’s edge. In competitive craft shows I’ve judged, winning entries consistently demonstrated finishing excellence—not necessarily complex stitches, but perfect tension in seaming, edges that lay flat without pins, and interiors as neat as exteriors. These examples prove that professional finishes in crochet aren’t about expensive materials but about thoughtful execution that honors both the craft and the end user’s experience.
Customization and Adaptation Ideas for Professional Finishes
Professional finishes should enhance rather than dictate your creative vision, allowing thoughtful adaptation to project requirements and personal style. For bohemian-inspired blankets with intentional texture, consider replacing traditional borders with hand-knotted fringe—securely attach by folding yarn strands in half, pulling loops through the edge, and threading ends through loops before tightening. This finish complements rustic aesthetics while remaining durable. Modern minimalist garments benefit from “raw edge” finishes where the final row uses a tight single crochet worked through back loops only, creating a clean, folded appearance without added bulk. When working with colorwork, customize seam placement to follow color blocks rather than straight lines—this requires planning during construction but results in joins that appear intentional rather than disruptive. For items requiring frequent washing like dishcloths, adapt finishing by weaving ends along selvedge edges where friction is minimal, and reinforce corners with an extra round of tight slip stitches. Eco-conscious makers might incorporate visible mending techniques as intentional finishes—using contrasting yarn for darning repairs transforms potential flaws into design features that celebrate sustainability. When adapting patterns for different fibers, modify blocking expectations: a cotton sweater might need aggressive steam blocking to achieve drape, while the same pattern in wool requires gentle wet blocking to maintain structure. From teaching diverse student groups, I’ve observed that cultural influences inspire unique finishing adaptations—some makers incorporate traditional embroidery stitches along seams as signature elements. The key principle: finishes should serve the project’s purpose and your artistic voice. A baby blanket demands secure, washable finishes; a wall hanging prioritizes dimensional stability; a fashion garment requires flexibility and drape. By viewing finishing as a creative opportunity rather than a technical obligation, you develop a distinctive maker’s signature that elevates every project while maintaining professional standards.
Care and Maintenance Best Practices for Professionally Finished Crochet Items
Preserving professional finishes requires educating both makers and end users about proper care protocols tailored to fiber content and construction. For wool and animal fiber items, hand-washing in cool water with pH-neutral wool wash remains the gold standard—never agitate or wring, but gently submerge, soak for 15 minutes, then press water out with towels before reshaping on a flat surface. Cotton and linen items withstand machine washing on gentle cycles but benefit from air drying flat to prevent stretching at stress points like shoulders. Acrylic items resist moths and mildew but pill easily; turn garments inside out before machine washing and use a gentle cycle with cold water. After washing any item, always reshape while damp to maintain the dimensions achieved during initial blocking—this simple step prevents gradual distortion over time. For storage, fold items rather than hanging to avoid shoulder bumps on garments or stretching on blankets; use acid-free tissue paper between folds for long-term storage, and include cedar blocks rather than mothballs to deter pests without chemical odors. Periodically inspect stored items for pests or humidity damage, especially in seasonal climates. For high-use items like blankets, rotate between multiple pieces to distribute wear evenly. When pilling occurs on synthetics or wool blends, use a fabric shaver gently on low settings—test on an inconspicuous area first. Crucially, include detailed care cards with handmade gifts or sales items specifying washing methods, drying instructions, and storage recommendations. From my work with fiber conservators, I’ve learned that the most beautifully finished item loses its professional appearance without appropriate care—finishing excellence must be matched by maintenance awareness to ensure longevity. These practices protect your craftsmanship investment and demonstrate professionalism that builds customer trust and loyalty.
Monetization Opportunities Through Professional Finishes in Crochet
While this guide emphasizes technique over commerce, understanding how professional finishes create legitimate monetization pathways supports sustainable handmade businesses when approached ethically. Exceptional finishing quality directly enables premium pricing—customers recognize and value meticulous craftsmanship, allowing makers to price items 20-40% above market averages for comparable but poorly finished pieces. This isn’t about inflating prices arbitrarily but reflecting the genuine time investment and skill required for professional results. Beyond product sales, finishing expertise creates service opportunities: many crocheters struggle with blocking or seaming and will pay for finishing services on their completed projects. Teaching workshops focused exclusively on finishing techniques fills a recognized gap in crochet education—beginners learn fundamentals while advanced makers refine specialized skills. Developing and selling digital patterns that include comprehensive finishing instructions (with photos or video supplements) adds significant value, building customer trust and reducing support queries. From observing successful handmade brands, I’ve noted that showcasing finishing details in social media content—time-lapses of blocking transformations or close-ups of invisible seams—builds authority and attracts clients seeking quality. Collaborations with yarn companies often center on finishing demonstrations that highlight fiber properties. Crucially, monetization must stem from authentic expertise and transparent value exchange—never promise “instant professional results” or sell “secret techniques” that don’t exist. Ethical monetization respects customers’ intelligence by educating them about why finishes matter while delivering genuine quality. This approach builds sustainable businesses where financial success aligns with craft advancement, creating positive cycles of skill development and market recognition that benefit the entire handmade ecosystem.
Frequently Asked Questions About Professional Finishes in Crochet
What is the single most important finishing technique for beginners to master first?
Weaving in ends securely forms the essential foundation for all other finishing work. Many beginners rush this step, leaving short tails that unravel after minimal wear. Master weaving at least two inches horizontally through back loops, then changing direction for another inch before trimming. Practice on scrap yarn until the motion becomes automatic—this single habit prevents most finishing-related failures and builds confidence for more complex techniques. Remember that ends woven properly during creation save significant time compared to finishing accumulated tails later.
Can I achieve professional finishes without blocking my projects?
Blocking is non-negotiable for professional results in nearly all crochet projects. Unblocked items typically display uneven tension, distorted shapes, and closed-up stitch patterns—particularly problematic in lacework or garments. The misconception that “blocking is optional” stems from working with very stiff fibers or simple projects where flaws are less noticeable. However, even a quick spray block dramatically improves stitch definition and drape. For time-pressed makers, develop a streamlined blocking routine: keep mats and pins assembled in a dedicated space, and block items while preparing your next project. The fifteen minutes invested prevents hours of frustration from misshapen finished objects.
How do I choose between wet blocking, spray blocking, and steam blocking for my project?
Fiber content dictates the appropriate blocking method. Wool, alpaca, and other animal fibers respond best to wet blocking (full immersion), which relaxes fibers and allows significant reshaping. Cotton, linen, and bamboo benefit from spray blocking (light misting) or light steam blocking since they lack elasticity and can stretch permanently when wet. Acrylic and other synthetics require steam blocking only—hover a steamer several inches above the fabric without direct contact to avoid melting fibers. When working with blends, default to the more delicate fiber’s requirements. Always test your chosen method on a swatch first, especially with hand-dyed yarns that might bleed. Professional finishes demand this fiber literacy—matching technique to material prevents irreversible damage.
What budget-friendly tools can dramatically improve my finishing results?
You don’t need expensive equipment to achieve professional finishes. Start with three affordable essentials: rust-proof T-pins (prevents staining on light yarns), a tapestry needle with a large eye (prevents yarn splitting), and sharp embroidery scissors (ensures clean cuts). Substitute expensive blocking mats with interlocking foam floor tiles from hardware stores—they’re waterproof, pin-friendly, and cost under twenty dollars for a large set. A clean kitchen towel works adequately for small-item blocking when dedicated mats aren’t available. For steam blocking without a garment steamer, use a standard clothes iron on steam setting held well above the fabric—never touch the iron directly to crochet. These accessible tools, used correctly, produce results rivaling professional setups when paired with proper technique knowledge.
How can I make mattress stitch seams truly invisible on crochet garments?
Achieving invisible mattress stitch requires attention to three details often overlooked. First, seam from the right side of the fabric rather than the wrong side—this allows real-time adjustment of tension and alignment. Second, work with the garment pieces pinned together every two inches to prevent shifting during seaming. Third, match not just rows but specific stitch elements: for single crochet, pick up the horizontal bar between stitches; for double crochet, work between the “V” shapes at the top of stitches. Maintain consistent, slightly loose tension—pulling too tight creates ridges. After seaming, lightly steam the seam allowance from the wrong side (without direct contact) to relax stitches and meld the seam flat. Practice on swatches with contrasting yarn first to see your technique clearly before attempting on valuable projects.
Does yarn weight affect which finishing techniques work best?
Yarn weight significantly influences finishing approach. With lace-weight yarns, use finer pins and needles to avoid distorting delicate stitches during blocking and weaving. Super bulky yarns require different strategies—blocking may involve minimal water application to prevent excessive weight when wet, and ends should be woven for longer distances (three to four inches) due to yarn thickness. For medium weights (worsted, DK), standard techniques apply, but always adjust pin spacing during blocking: finer yarns need pins every inch for lace definition, while bulky yarns require pins only at critical points to avoid unnecessary handling. When seaming different weights, match hook sizes to yarn weight for borders—using a hook too large creates ruffled edges on fine yarns, while too small causes tight, inflexible borders on bulky projects. Understanding these weight-specific adaptations prevents finishing frustration and elevates results across your entire project range.
Conclusion
Achieving professional finishes in advanced crochet projects represents the culmination of technical skill, material knowledge, and mindful craftsmanship. Throughout this guide, we’ve explored how meticulous attention to blocking, seaming, end weaving, and edging transforms handmade items from merely functional to exceptional. The journey toward finishing excellence demands patience and deliberate practice—there are no true shortcuts, only refined techniques honed through repetition and observation. Remember that professional finishes serve both aesthetic and functional purposes: they enhance visual appeal while improving durability, comfort, and longevity. As you apply these methods to your work, start with small projects to build confidence before tackling complex garments or lace pieces. Document your finishing experiments in a dedicated journal, noting which techniques succeeded with specific yarns and constructions. Most importantly, view finishing not as a burdensome final step but as an integral creative phase where your craftsmanship truly shines. Whether you crochet for personal satisfaction or professional purposes, these finishing skills will elevate your work, earn admiration from peers, and bring deeper satisfaction to your making process. The handmade items we create carry our care and attention into the world—ensuring they leave our hands with professional finishes honors both the craft and those who will cherish our creations for years to come. Keep practicing, stay curious about fiber behaviors, and take pride in the polished details that distinguish your work in an increasingly handmade-conscious world.

Emily Harrison is a passionate crochet artist and creative entrepreneur, inspired by handmade craftsmanship, slow living, and the beauty of turning yarn into meaningful pieces. Driven by creativity and patience, she blends traditional techniques with modern design, constantly exploring new patterns and textures. Through her work, Emily shares her love for crochet as a form of self-expression, mindfulness, and creative freedom, while building projects that reflect authenticity, warmth, and continuous artistic growth.


